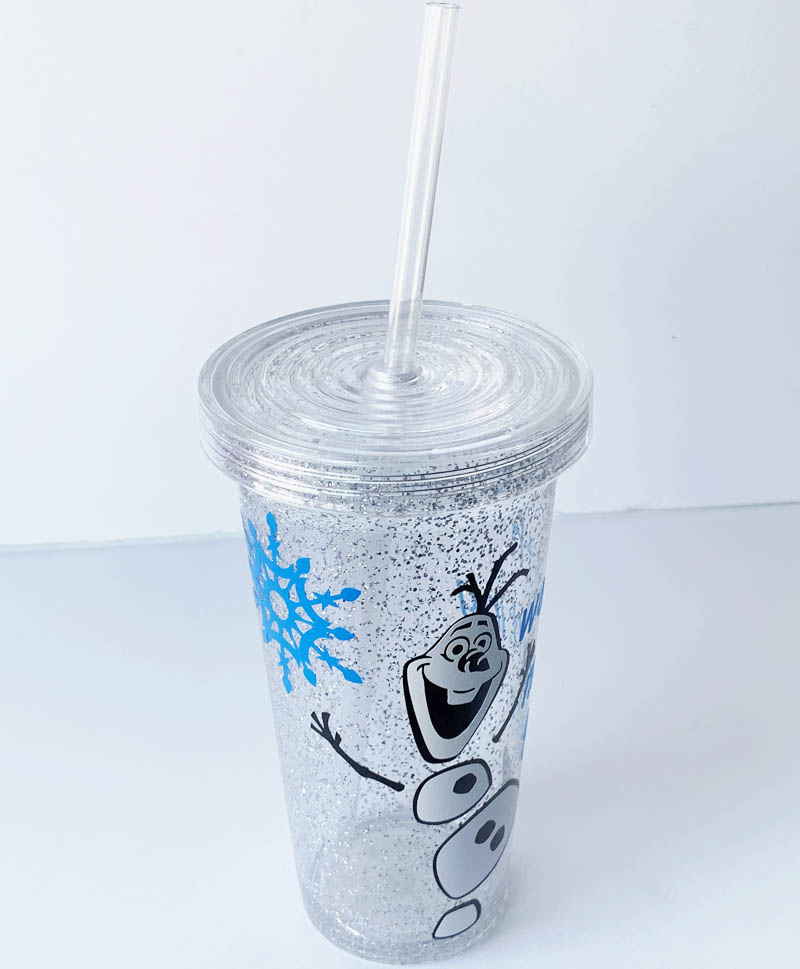
Vinyl Customized Cup
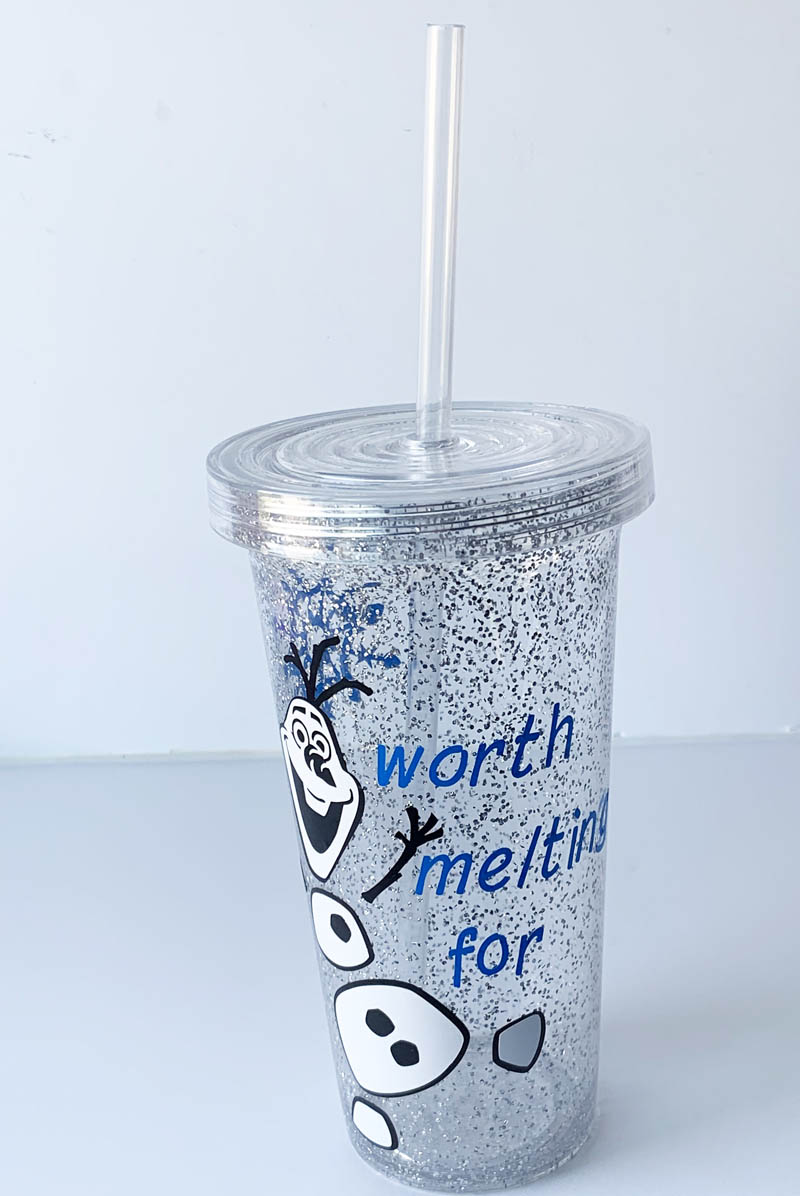
Water bottles and reusable cups such as this one is a wonderful surface to add custom vinyl to! With some permanent sticker vinyl, your ScanNCutSDX230 exclusive Disney files, and a bit of imagination you can quickly be on your way to creating the perfect cup for your next cold drink. Using transfer material ensures a smooth transition from concept to placed onto your cup and is really a great way to make the most of this project. Will Olaf help keep that iced tea frosty cold? Can’t hurt!
Supplies Needed: ScanNCutSDX230, standard mat, black, white, and blue sticker vinyl, transfer sheet, and a cup
1. Place (approximately) 5×7 pieces of white and black sticker vinyl on your ScanNCut mat, and load into your machine.
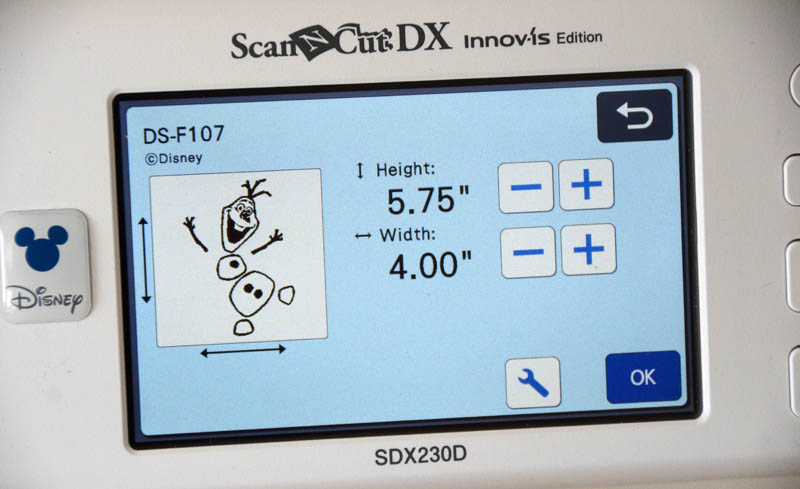
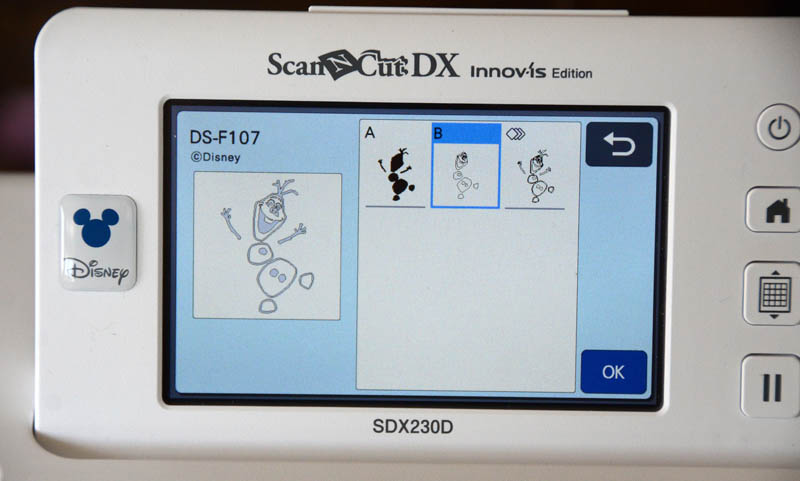
2. Select the Olaf Pattern (DS-F107) and size it as desired (4” wide for my cup). Select the first part of the pattern and place onto the mat. Then add and select the second part of the pattern, placing on the mat as well. Scan the mat if needed to adjust placement so that each is over the appropriate piece of vinyl cut and placed on your mat.
3. Once set, click ‘ok’ through the screens to the select function screen and select cut. If the half cut is not already turned on, select the tool button, and on the second screen turn half cut to on. This will cut the vinyl and not your backing sheet so that the material is properly cut and ready for transfer. Click to start and the auto blade will determine depth and cut out the vinyl.
4. Once finished, remove the material from the mat and set it aside. Then place a 6×12 piece of blue vinyl onto your mat and load back into the ScanNCut machine.
5. Select a snowflake pattern (DS-F113 shown here) and size to approximately 2.5” wide. Click OK to add to your screen, then click to add another pattern.
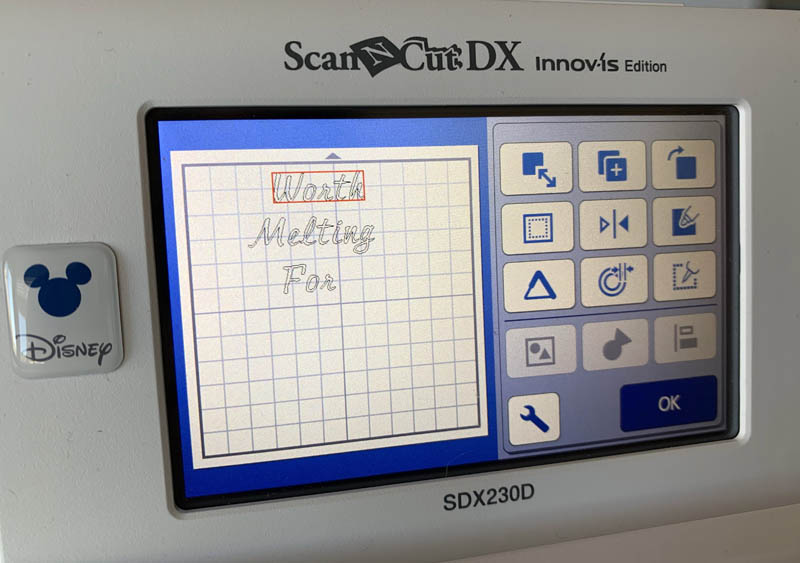
6. Select a font (FO-A007 used here) and type “worth” and press ok. Note: do not try to size at this time. Repeat this step with “waiting” and a third time “for”.
Tip: I like to do these separately so that you can line up and size the words independently of each other. If you do them all at once, it will create a single file vs multiple.
7. Once you have all of your words typed, move them into position one on top of the other and make note of the total height size. Then click to select all 3 files, and unify the file before resizing larger or smaller depending on your cup size and the total height desired. By unifying and resizing you will ensure an even height. Once done, you can “undo” the grouping to resume moving around on the mat. In my example, the words have a finished size of 1” high each.

8. Move the pieces so they will fit onto your mat as you like, leaving at least ½” between words so that you have room to move them individually when it is time to transfer them onto your cup. Once satisfied, select the cut function and ensure half-cut is turned on in the tool screen. Start to cut these items out.
9. Weed or remove all excess vinyl from all of your designs created. Use a pick tool for small and delicate areas, and feel free to cut around designs with scissors to reduce waste and make a smaller area to weed.
10. Place a piece of transfer material over the white Olaf design once weeded. Press down and lift up transfer material. Then place over the black Olaf background and press down firmly into place. This will layer and unify your Olaf design. Your next step will be to lift the transfer material with this unified design and place onto your cup as desired.
11. Once Olaf has been placed, repeat with transfer material lifting and placing one word at a time from the backing sheet onto transfer material and into perfect position on your cup. Your final step will be to place the snowflake the same way, then enjoy!